Before installing DMARC, you must have a DKIM record and SPF record on your domain. DMARC setup will only be available if these steps are already taken.
DMARC stands for Domain-based Message Authentication, Reporting, and Conformance. DMARC instructs email services on how to handle mail from your domain to help prevent fakes and imposters. DMARC can be managed by going to your Account tab, choosing Campaign Settings, and selecting DMARC Management.
Once you have installed your SPF and DKIM records, you should see a list of authenticated domains. The domain name, SPF status, DKIM status, DMARC status, and DMARC reports (if DMARC has been successfully installed) will be available here.

For instructions on adding DMARC to your account, click the "+ Add DMARC" button. This will open the DMARC Setup Wizard as pictured below:
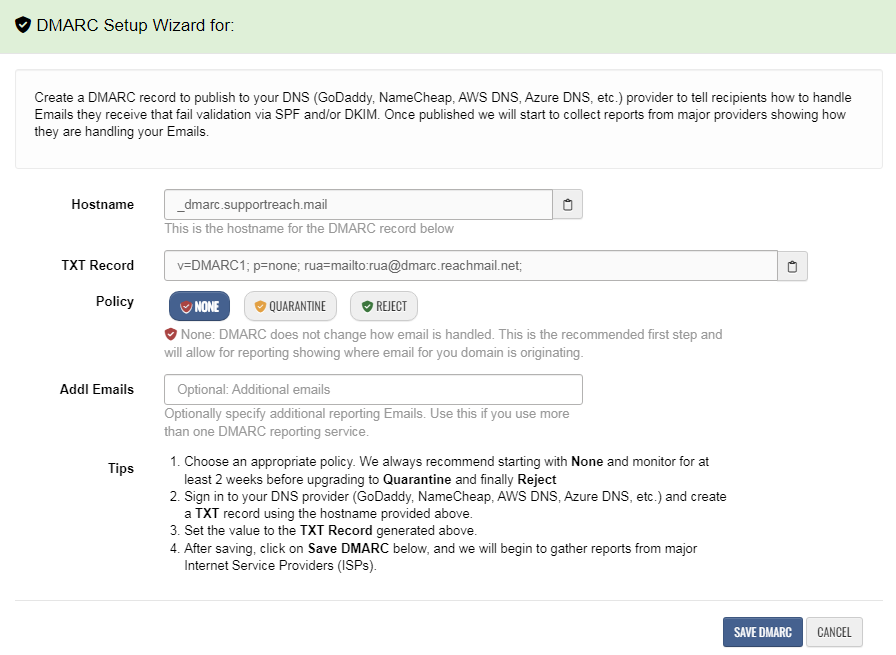
- Hostname - The domain or subdomain that is specified in the DMARC record.
- TXT Record - DNS TXT record value to be installed.
- Policy
- None - DMARC does not change how email is handled. This is the recommended first step and will allow for reporting showing where the email for your domain is originating.
- Quarantine - DMARC instructs recipients to set aside questionable emails for further processing, usually exiled to the "Junk" folder. This is recommended only once an email from legitimate sources is fully authenticated.
- Reject - DMARC instructs recipients to reject emails not authorized for delivery by your SPF and/or DKIM policies. This is a strong level of protection and should be used once all legitimate traffic sources are authenticated correctly.
- Additional Emails (Optional) - Specify additional reporting emails. Use this if you use more than one DMARC reporting service.
Tips
- Choose an appropriate policy. We always recommend starting with None and monitoring for at least two weeks before upgrading to Quarantine and finally Reject.
- Sign in to your DNS provider and create a TXT record using the provided hostname.
- Set the value to the TXT Record generated above.
- After saving, click the Save DMARC button, and we will gather reports from major Internet Service Providers (ISPs).
