Loading the support system

Creating a subscription form is easy in ReachMail. Go to your Tools tab and select the Subscription Forms option. From there you can click on the Add Form button to start creating a new sign-up form. For paid ReachMail accounts you can select from a simple form or an advanced form.
SIMPLE FORMS

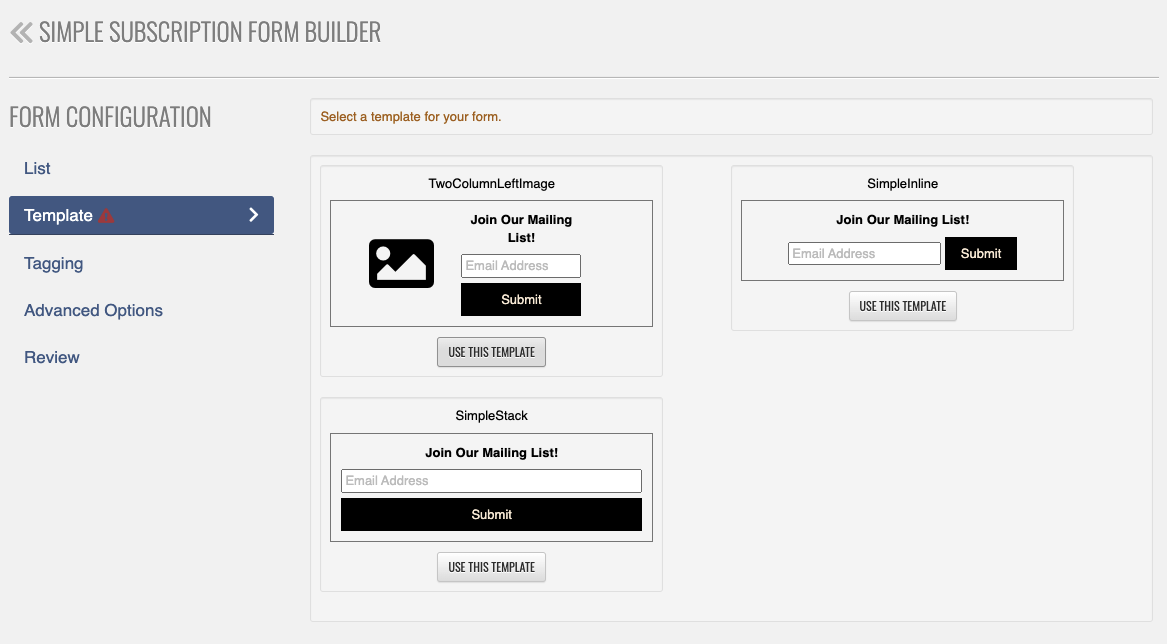
After the list selection, you must select SAVE AND CONTINUE to move to the templates section.
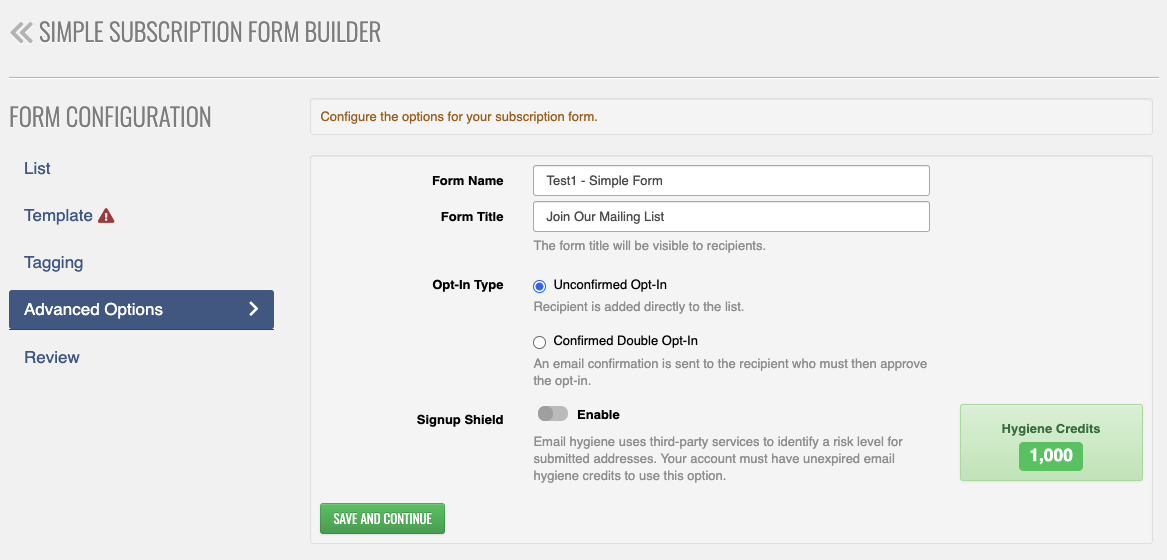
You then have the options for Tagging your sign-ups with tags you have created to use in later mailings. Then in the Advanced options, You can make some small changes to the format of your forms. ReachMail's Signup Shield uses Email Hygiene credits to identify a risk level for submitted addresses. You must have unexpired email hygiene credits to use this option. High-risk signups are automatically identified and neutralized as they occur.
ADVANCED FORMS
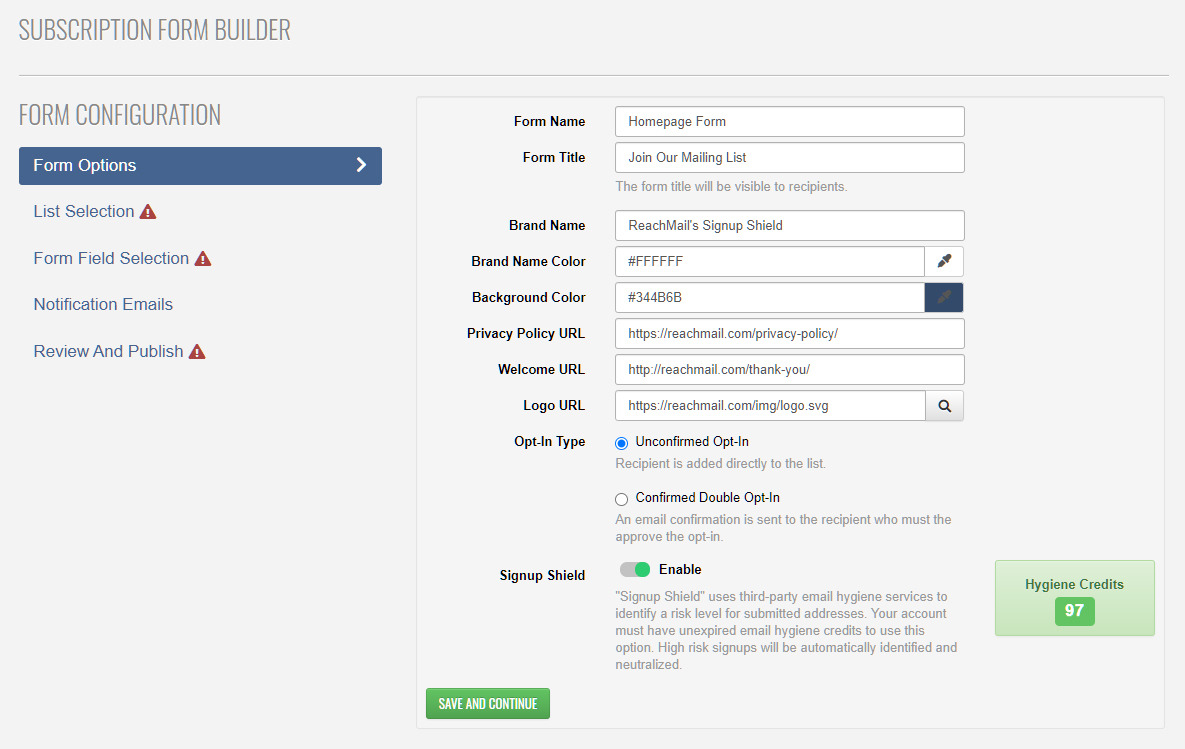
The first area to fill out is the Form Options. This includes the Form Name and Opt-In Type as required fields. Opt-In Type options are confirmed or unconfirmed. A confirmed opt-in sends an email confirmation to the recipient who must approve the opt-in. Optional fields include Form Title, Brand Name, Brand Name Color, Background Color, Privacy Policy URL, Welcome URL, Logo URL, and Signup Shield (only available on unconfirmed opt-in type).
ReachMail's Signup Shield uses Email Hygiene credits to identify a risk level for submitted addresses. You must have unexpired email hygiene credits to use this option. High-risk signups are automatically identified and neutralized as they occur.
After filling out these fields, click the Save and Continue button to proceed to List Selection. List Selection is where you choose which list for your signup form to populate. On this page, you can select an existing list or create a new list. A public list name is assigned, which is used as an alias for the list and is shown to users who are signing up.
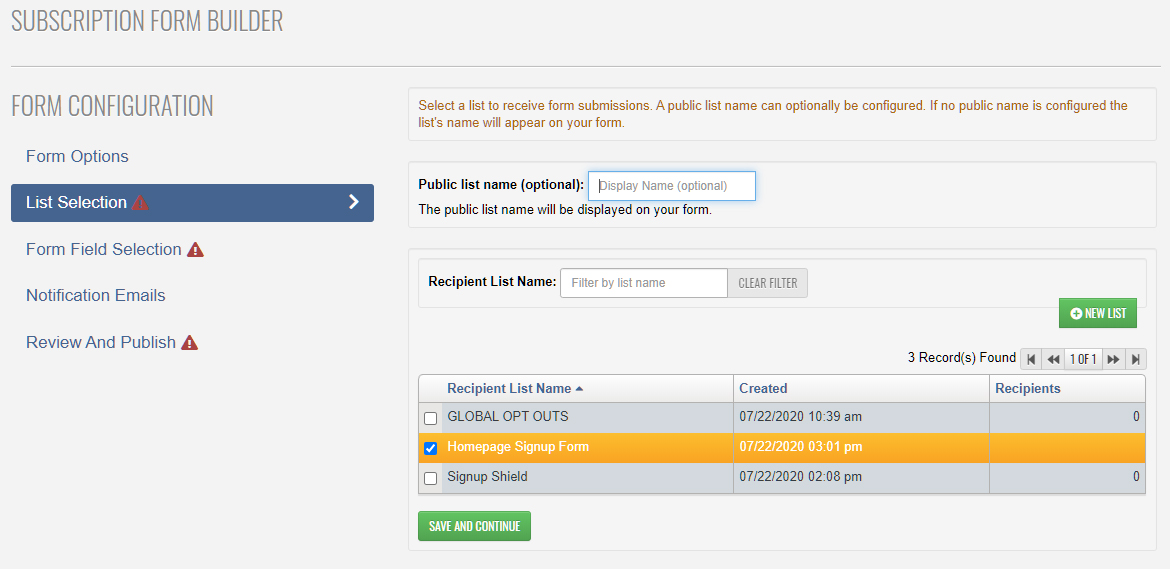
Once a list has been selected you may proceed by clicking on the Save and Continue option. Clicking the button will bring you to the Form Field Selection. The options you see on this page are dependent on the field included in the selected list in the previous step. Using the toggle button you'll be able to select which fields you would like to include on your form and which are required. Additionally, you can use the up and down area to sort the order in which the fields appear.
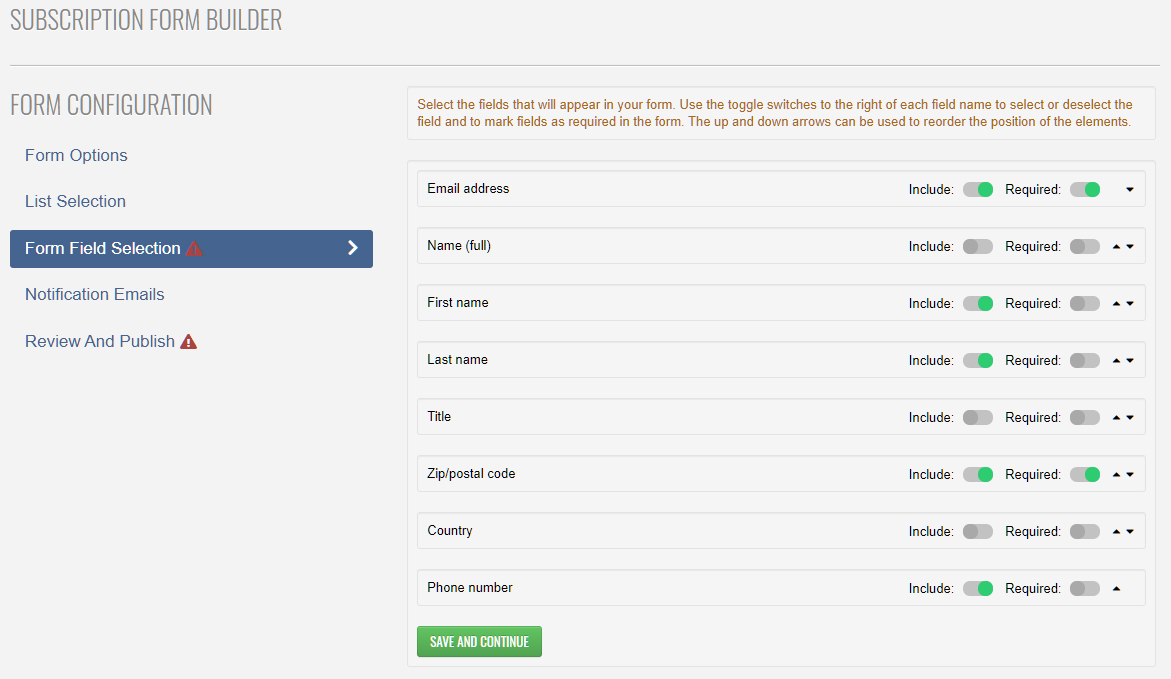
Double-check to ensure all the fields you would like included are present, then click on the Save and Continue button. Doing so will bring you to the Notification Email selection. On this page, you'll be able to add an email address to be notified of sign-ups. This allows you to keep track of new sign-ups by choosing to receive an email daily or immediately when someone signs up. This is useful to monitor traffic on your forms but is completely optional. You can add one email address to receive notifications or multiple addresses.
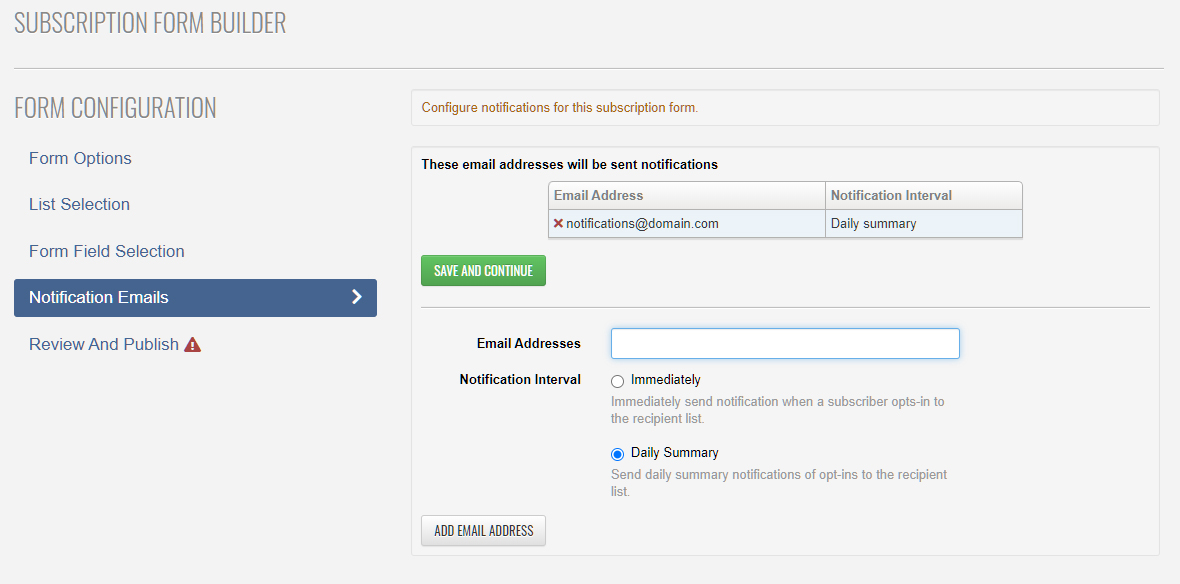
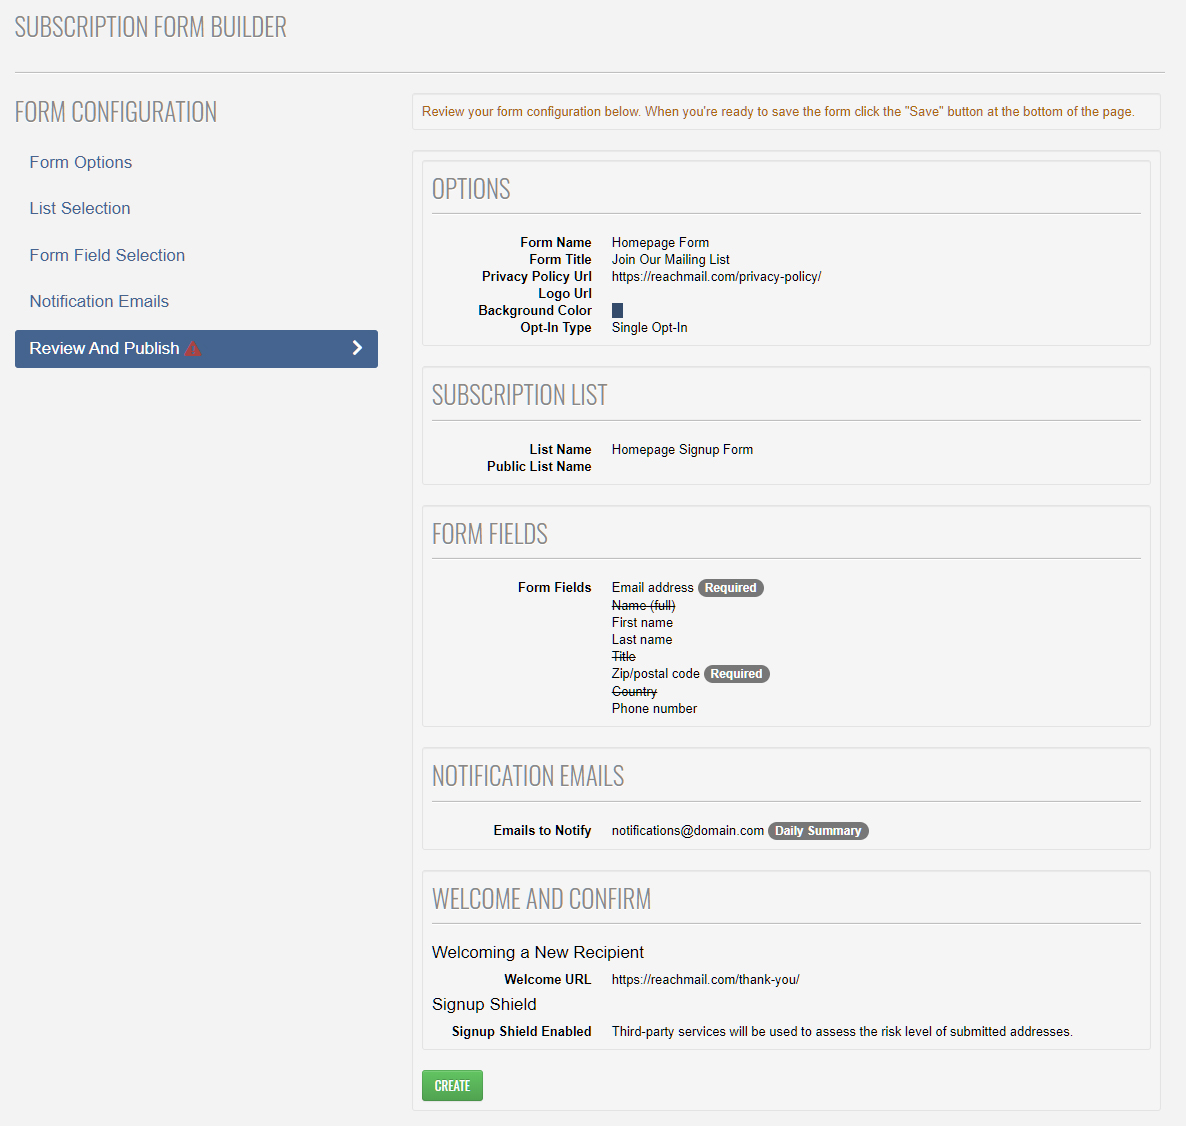
After you've added an email or have decided not to receive any notifications, you can use the Save and Continue prompt. The last page in the process will simply allow you to Review and Confirm the sign-up form. It will give you a breakdown of all the steps and you can easily go back and change anything that may seem off. If this page looks complete to you can click the Create button.
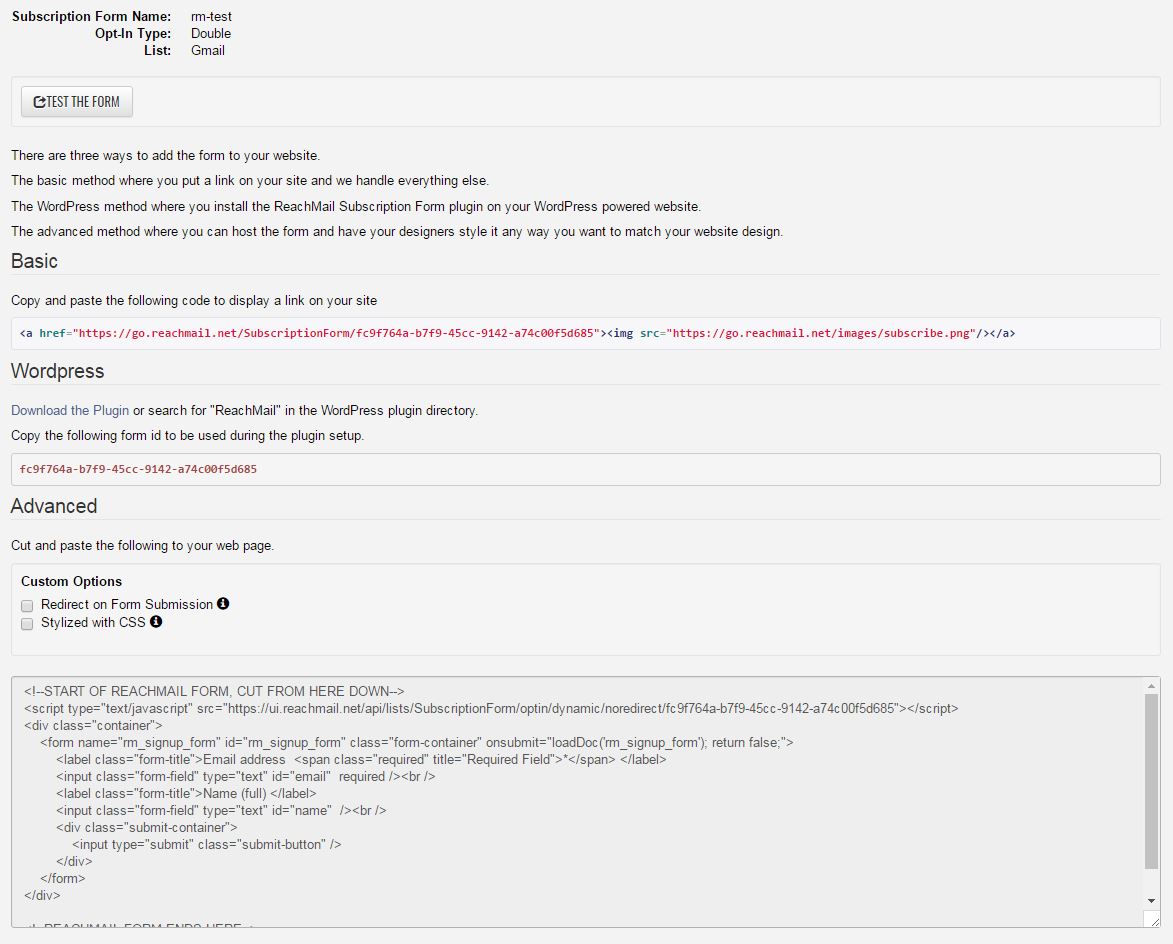
After selecting Submit you will be taken to the Subscription Form Contents page. This will give you three ways you can add your form to your website. The basic method where you put a link on your site and we handle everything else, the WordPress method where you install the ReachMail Subscription Form plugin on your WordPress powered website, and the advanced method where you can host the form and have your designers style it any way you want. Additionally, you can use the Test The Form button to ensure that the sign-up form is working to your expectations. There are also some Custom Options that can be enabled to Redirect on Form Submission and Stylize with CSS.